Tool Guns
How to create new Tool Guns for nanos world
This Tool Gun approach is a convention of the Sandbox game-mode and is not a game-wide concept.
The sandbox game-mode defines a ToolGun class (see on GitHub: Server & Client) which helps on creating new tools based on a base Tool Gun.
Creating a custom Tool Gun
To create your own Tool based on Sandbox's ToolGun, you need to create a new Class inheriting from it passing some custom parameters to the Class, like that:
MyToolGun = ToolGun.Inherit("MyToolGun", {
-- Spawn Menu
name = "My Tool Gun",
image = "package://my-package/MyToolGun.webp",
category = "special",
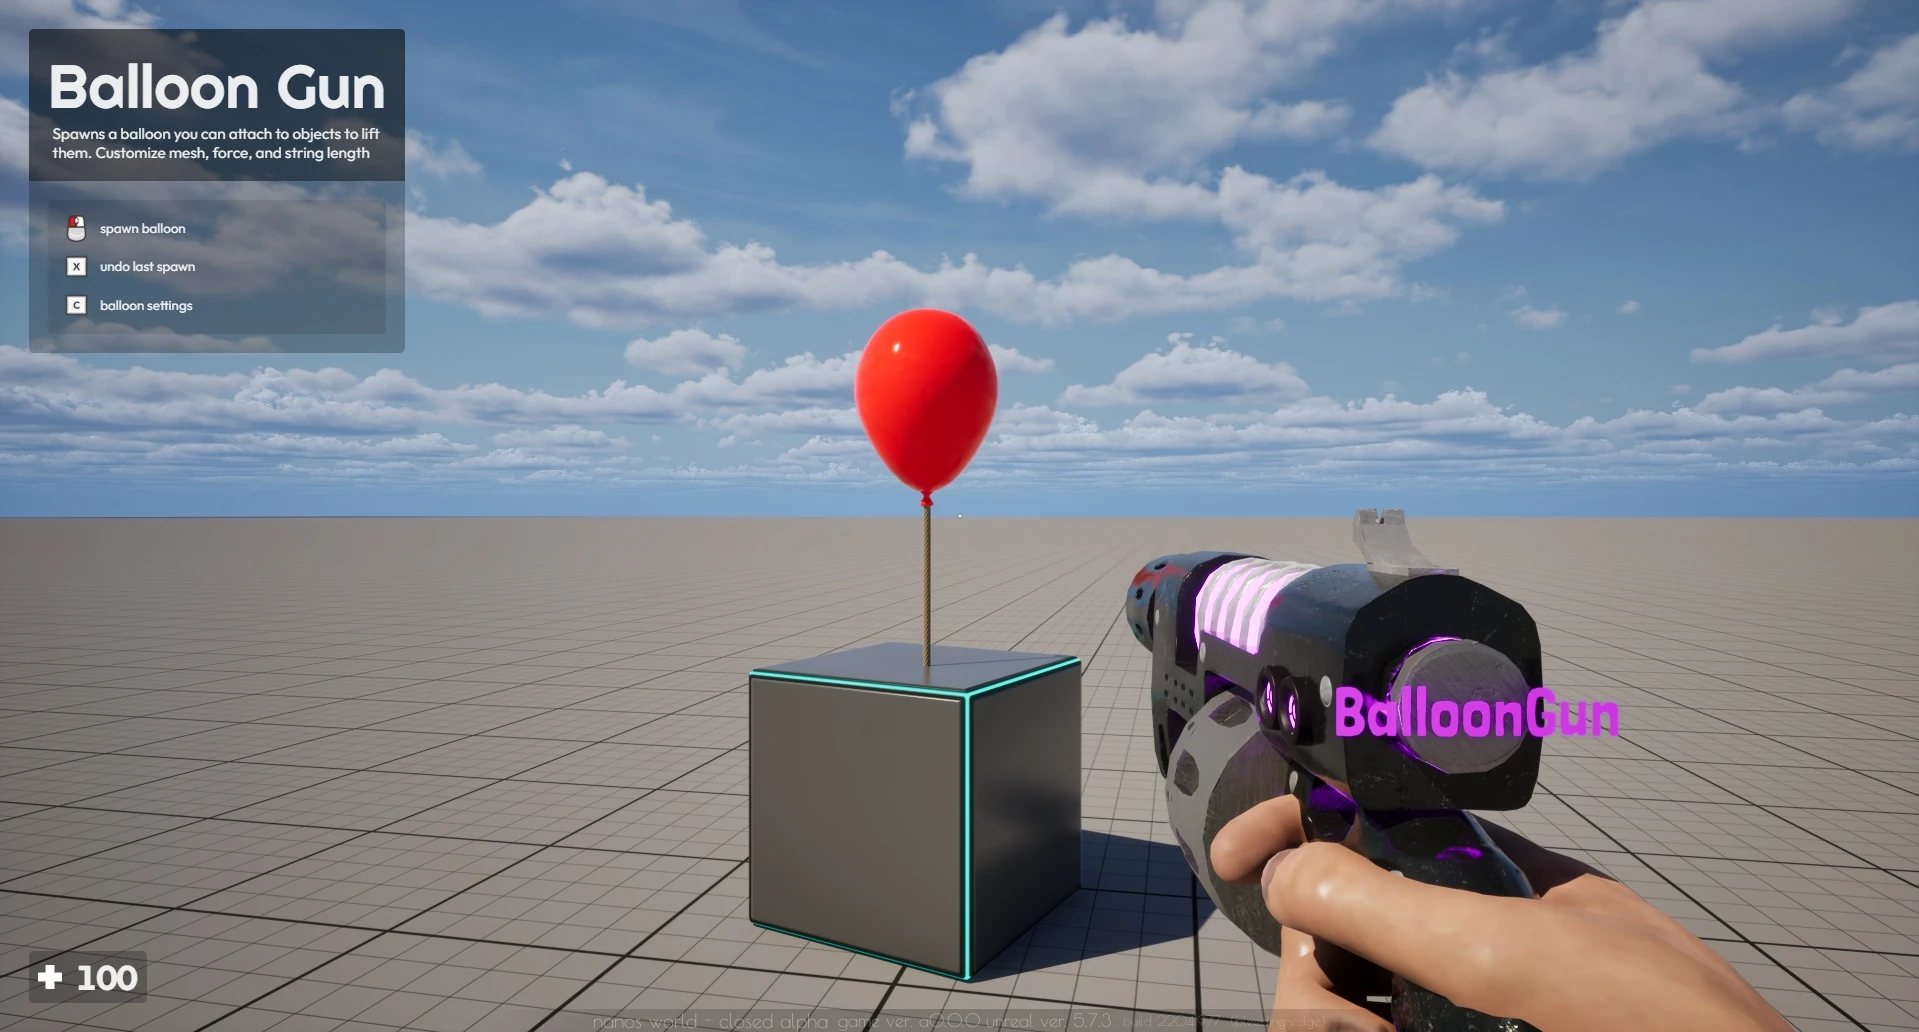
-- Tool Gun Description which will be displayed on Top Left
description = "Do magic things!",
-- Tool Gun Tutorials which will display on Top Left
tutorials = {
{ key = "LeftClick", text = "spawn my entity" },
{ key = "Undo", text = "undo spawn" },
{ key = "ContextMenu", text = "spawn settings" },
},
-- Tool Gun Tips that will appear as notifications at each 1 minute
tips = {
"you can use this tool gun to do awesome stuff!",
"be aware to do not have overdose of fun!"
},
-- Tool Gun Trace Debug Settings, which will display on World when aiming with this Tool Gun
debug_trace = {
-- Defines which Collision Channel to trace when firing with this Tool Gun
collision_channel = CollisionChannel.WorldStatic | CollisionChannel.WorldDynamic | CollisionChannel.PhysicsBody | CollisionChannel.Vehicle,
-- If the tool gun should display a crosshair on the trace result when aiming
show_crosshair = false,
-- If the tool gun should display a preview mesh on the trace result when aiming
show_preview_mesh = true,
-- Preview mesh configuration
preview_mesh = "nanos-world::SM_Toaster",
preview_mesh_scale = Vector(1, 1, 1),
preview_mesh_offset = Vector(0, 0, 0),
preview_mesh_rotation = Rotator(0, 0, 0),
preview_mesh_rotation_fixed = false
}
})
The values name, image and category are used by Spawn Menu to display it properly on it.
The other values tutorials and debug_trace are used by the ToolGun to add custom tutorials or behaviors when using it. Those parameters are optional.
Those values are only used on Client Side!
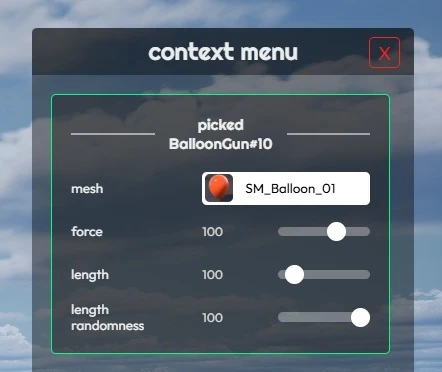
You can also add custom entries to the Context Menu for your Tool Gun by defining a picked_context_menu_items table on your Tool Gun class like that, the configs will appear when you pick up the tool gun and open the Context Menu:
-- Defines the initial value for your custom Tool Gun value
MyToolGun.my_custom_value = 123

-- My Tool Gun Context Menu Callback
function MyToolGun.SetMyCustomValue(value)
	MyToolGun.my_custom_value = value

	-- You can do something with this value here,
	-- 	like calling remote event to inform the server side
end

-- Tool Gun Context Menu Entries which will display on Context Menu
MyToolGun.picked_context_menu_items = {
	{
		id = "my_tool_gun_custom_value",
		type = "number",
		label = "custom value",
		callback = MyToolGun.SetMyCustomValue,
		value = MyToolGun.my_custom_value
	},
},
You can see how to configure the context menu items in the Context Menu Docs Page.
Overriding ToolGun Client Methods
The ToolGun has some methods on Client Side which you can override to implement custom behaviors to your tool when the Local Player interacts with it.
You can just override them in your custom Tool Gun class to implement them:
-- Called when you Fire with it
function MyToolGun:OnLocalPlayerFire(character)
	-- Do something

	-- Something useful to do here is tracing for where the Player fire
	-- and send that coordinate to server to spawn something at that location
end

-- Called when you Pick Up it
function MyToolGun:OnLocalPlayerPickUp(character)
	-- Do something

	-- Like starting an effect or calculation
end

-- Called when you Drop it
function MyToolGun:OnLocalPlayerDrop(character)
	-- Do something

	-- You will much likely want to disable any effect or similar thing when
	-- you drop your Tool
end
Tool Gun Single & Double Target
We have implemented two child classes of ToolGun called ToolGunSingleTarget and ToolGunDoubleTarget which have some extra functionalities to make it even easier to create Tool Guns that require one or two targets when firing.
ToolGunSingleTarget
This class is useful when you want to create a Tool Gun that requires only one target when firing, for example, a Tool Gun that spawns an entity at the trace location when firing.
It makes really easy to implement it as you can just override the OnLocalPlayerTarget method which will be called with the trace result when firing with the Tool Gun, so you can just send that coordinate to the server to spawn something at that location.
MyToolGun = ToolGunSingleTarget.Inherit("MyToolGun")

-- Overrides ToolGunSingleTarget method
function MyToolGun:OnLocalPlayerTarget(location, relative_location, relative_rotation, normal, entity)
	-- Calls remote to spawn something at that location
	self:CallRemoteEvent("SpawnSomething", Reliability.Reliable, location, relative_location, relative_rotation, normal, entity)
end
ToolGunDoubleTarget
This class is useful when you want to create a Tool Gun that requires two targets when firing, for example, a Tool Gun that welds two entities together.
You can override the OnLocalPlayerTarget method that will be called only when having both targets set, so you can just send both coordinates to the server to do something with them.
MyToolGun = ToolGunDoubleTarget.Inherit("MyToolGun")

-- Overrides ToolGunDoubleTarget method
function MyToolGun:OnLocalPlayerTarget(targeting_first_to, targeting_first_relative_location, targeting_first_relative_rotation, targeting_second_to, targeting_second_location, targeting_second_rotation)
	-- Calls remote to weld the two entities together
	self:CallRemoteEvent("Weld", Reliability.Reliable, targeting_first_to, targeting_second_to, targeting_second_location)
end
Examples
You can find more examples of Tools in the Sandbox's Tools/ folder on both Client and Server side.
Now it's up to you to to create your own Packages with your own Tools!