基本 HUD(React)
如何使用 React 添加基本 HUD 以显示角色的生命值和弹药。
创建 React 应用
本教程不会教授如何使用 React。理解本教程需要对该框架有基础了解。你可以在此处找到一些文档和教程。
在你选择的文件夹中,创建一个新的 React 应用,用于构建我们的 UI。 We will use Vite, the recommended way to start a new React project. Execute the following commands in your terminal (it requires Node.js installed):
npm create vite@latest basic-hud -- --template react
cd basic-hud
npm install
你的应用文件夹结构应如下所示:
basic-hud/
├── public/
├── src/
│   ├── assets/
│   ├── App.css
│   ├── App.jsx
│   ├── index.css
│   └── main.jsx
├── index.html
├── package.json
└── vite.config.js
应用的基本配置
在开始添加代码之前,需要配置一些内容以确保你的应用与 nanos world 兼容:
-
Using relative paths in the build
The WebUI loads your App from the package files (file://), so the build must reference its files with relative paths. Edit your vite.config.js and add the base option:
import { defineConfig } from 'vite'
import react from '@vitejs/plugin-react'

export default defineConfig({
  plugins: [react()],
  base: './',
})
-
添加 nanos world 事件处理
默认情况下,你的 React 应用无法处理原生 nanos world 事件。要解决此问题,请在应用的 src 目录中新建名为 Events.js 的文件,并添加以下代码:
const Events = {};

Events.Call = function (sEventName, ...args) {
    if (typeof (window.Events) == "undefined") return;
    window.Events.Call(sEventName, ...args);
}

Events.Subscribe = function (sEventName, callback) {
    if (typeof (window.Events) == "undefined") return;
    window.Events.Subscribe(sEventName, callback);
}

export default Events;
不要忘记在需要调用/订阅 nanos world 事件的组件中导入此文件
-
清理应用中未使用的文件
A few example files are present in the App by default. For the sake of cleanliness, we'll remove them:
./src/assets/react.svg./public/vite.svg
Also clear the contents of ./src/index.css, as we will write our own styles in App.css.
Don't forget to remove the references to the deleted files in ./index.html (the favicon link) and in ./src/App.jsx.
创建 UI
现在我们的应用已经就绪且与 nanos world 兼容,可以开始编写代码了。 Since this UI is very simple, we will use the default App.jsx component available in the src folder
import './App.css';

function App() {
  return (
    <div >
      {/* 生命值容器(黑色背景) */}
        <div id="health_container">
            <img src="./img/health.png" alt="health-cross"/>
              <span id="health_current">100</span> {/* 生命值 */}
        </div>

        {/* 武器弹药容器(黑色背景) */}
        <div id="weapon_ammo_container">
            <span id="weapon_ammo_clip">30</span> {/* 弹夹数值 */}
            <span id="weapon_ammo_bag">/ 1000</span> {/* 弹药袋数值 */}
        </div>
    </div>
  );
}

export default App;
如果你注意到我们使用了一张图片 health.png,可以在此处下载 https://i.imgur.com/0BmQJVZ.png 并将其放置在应用的 ./public/img 文件夹中。
When you're referencing files stored in the public folder you don't need to add public to the path. Once built, everything in the public folder is copied to the root folder of your app.
现在让我们为其添加样式。请编辑你的 App.css 文件并添加以下 CSS 代码:
body {
    font-family: Tahoma, sans-serif;
    font-size: 14px;
    margin: 0px;
    padding: 0px;
    margin-bottom: 20px;
}

#weapon_ammo_container {
    position: absolute;
    right: 0px;
    bottom: 0px;
    width: 200px;
    height: 50px;
    background-image: linear-gradient(to right, #00000000, #00000080);
    text-align: right;
    line-height: 47px;
}

#weapon_ammo_bag {
    color: #ededed;
    font-weight: bold;
    font-size: 16px;
    margin-right: 30px;
    position: relative;
    top: -4px;
}

#weapon_ammo_clip {
    color: white;
    font-weight: bold;
    font-size: 32px;
}

#health_container {
    position: absolute;
    bottom: 0px;
    width: 200px;
    height: 50px;
    background-image: linear-gradient(to left, #00000000, #00000080);
}

#health_container img {
    height: 23px;
    margin: 13px;
}

#health_current {
    color: white;
    font-size: 32px;
    font-weight: bold;
    position: absolute;
    margin-top: 4px;
}
要确保你的应用正常运行,只需启动应用并在网页浏览器中查看最终效果即可。为此,请使用以下命令:
npm run dev
You can see the running App at the address shown in the terminal, usually http://localhost:5173.
While developing, you can point your WebUI to this address (WebUI("Main HUD", "http://localhost:5173")) to get hot reload in-game. Remember to switch back to the built files before publishing!
启动后,你应该会在网页浏览器中看到类似这样的内容:

在应用中添加事件处理
现在应用的基础工作已准备就绪,我们可以开始实现事件处理功能。 For this, edit your App.jsx:
import './App.css';
import Events from './Events.js';
import { useState, useEffect } from 'react';


function App() {

  // Use React State to store the health and ammo values
  // The values are updated by the events from the server
  const [health, setHealth] = useState(100);
  const [weaponAmmo, setWeaponAmmo] = useState(30);
  const [weaponBag, setWeaponBag] = useState(1000);
  const [displayAmmo, setDisplayAmmo] = useState(false);

  // Subscribes to the events only once, when the component mounts
  // (subscribing directly in the component body would add a new subscription on every render)
  useEffect(() => {
    // Subscribe to the events related to the Ammo and visibility of the Ammo container
    Events.Subscribe("UpdateWeaponAmmo", (enable, clip, bag) => {
      setDisplayAmmo(enable);
      setWeaponAmmo(clip);
      setWeaponBag(bag);
    });

    // Subscribe to the events related to the Health
    Events.Subscribe("UpdateHealth", (health) => {
      setHealth(health);
    });
  }, []);

  return (
    <div >
      {/* Health container (black background) */}
        <div id="health_container">
            <img src="./img/health.png" alt="health-cross"/>
              <span id="health_current">{health}</span> {/* Health value */}
        </div>

        {/* Weapon Ammo container (black background) */}
        {displayAmmo &&
          <div id="weapon_ammo_container">
            <span id="weapon_ammo_clip">{weaponAmmo}</span> {/* Ammo Clip value */}
            <span id="weapon_ammo_bag">/ {weaponBag}</span> {/* Ammo Bag value */}
        </div>
        }
    </div>
  );
}

export default App;
UI 编码部分完成后,你可以对它进行 build,以便将其添加到你的 nanos world 包中!
构建你的 React 应用
完成 Web 部分的开发后,你需要对应用进行构建。在应用的根目录下,运行以下命令:
npm run build
When completed, you will find all the files of your application in the ./dist folder.
创建 UI 包
在包的 Client 文件夹内,新建一个名为 UI/ 的文件夹(可选),以便将 UI 文件与脚本(lua)文件区分开来:

After that copy all the files present in the ./dist folder of your React app into the UI/ folder of your nanos world Package.
最后,在包的 Index.lua 中,让我们添加生成和更新 UI 所需的所有代码:
-- Spawns a WebUI with the HTML file you just created
main_hud = WebUI("Main HUD", "file://UI/index.html", WidgetVisibility.VisibleNotHitTestable)

-- When LocalPlayer spawns, sets an event on it to trigger when we possess a new character. This event is only called once, see Package.Subscribe("Load") for when reloading the package
Client.Subscribe("SpawnLocalPlayer", function(local_player)
    local_player:Subscribe("Possess", function(player, character)
        UpdateLocalCharacter(character)
    end)
end)

-- When package loads, verify if LocalPlayer already exists (eg. when reloading the package), then try to get and store it's controlled character
Package.Subscribe("Load", function()
    local local_player = Client.GetLocalPlayer()
    if (local_player ~= nil) then
        UpdateLocalCharacter(local_player:GetControlledCharacter())
    end
end)

-- Function to set all needed events on local character (to update the UI when it takes damage or dies)
function UpdateLocalCharacter(character)
    -- Verifies if character is not nil (eg. when GetControlledCharacter() doesn't return a character)
    if (character == nil) then
        return
    end

    -- Updates the UI with the current character's health
    UpdateHealth(character:GetHealth())

    -- Updates the health UI whenever the health changes (damage, healing, death or respawn)
    character:Subscribe("HealthChange", function(charac, old_health, new_health)
        UpdateHealth(new_health)
    end)

    -- Try to get if the character is holding any weapon
    local current_picked_item = character:GetPicked()

    -- If so, update the UI (IsA also matches classes inherited from Weapon)
    if (current_picked_item and current_picked_item:IsA(Weapon)) then
        UpdateAmmo(true, current_picked_item:GetAmmoClip(), current_picked_item:GetAmmoBag())
    end

    -- Sets on character an event to update his grabbing weapon (to show ammo on UI)
    character:Subscribe("PickUp", function(charac, object)
        if (object:IsA(Weapon)) then
            UpdateAmmo(true, object:GetAmmoClip(), object:GetAmmoBag())
        end
    end)

    -- Sets on character an event to remove the ammo ui when he drops it's weapon
    character:Subscribe("Drop", function(charac, object)
        UpdateAmmo(false)
    end)

    -- Sets on character an event to update the UI when he fires
    character:Subscribe("Fire", function(charac, weapon)
        UpdateAmmo(true, weapon:GetAmmoClip(), weapon:GetAmmoBag())
    end)

    -- Sets on character an event to update the UI when he reloads the weapon
    character:Subscribe("Reload", function(charac, weapon, ammo_to_reload)
        UpdateAmmo(true, weapon:GetAmmoClip(), weapon:GetAmmoBag())
    end)
end

-- Function to update the Ammo's UI
function UpdateAmmo(enable_ui, ammo, ammo_bag)
    main_hud:CallEvent("UpdateWeaponAmmo", enable_ui, ammo, ammo_bag)
end

-- Function to update the Health's UI
function UpdateHealth(health)
    main_hud:CallEvent("UpdateHealth", health)
end
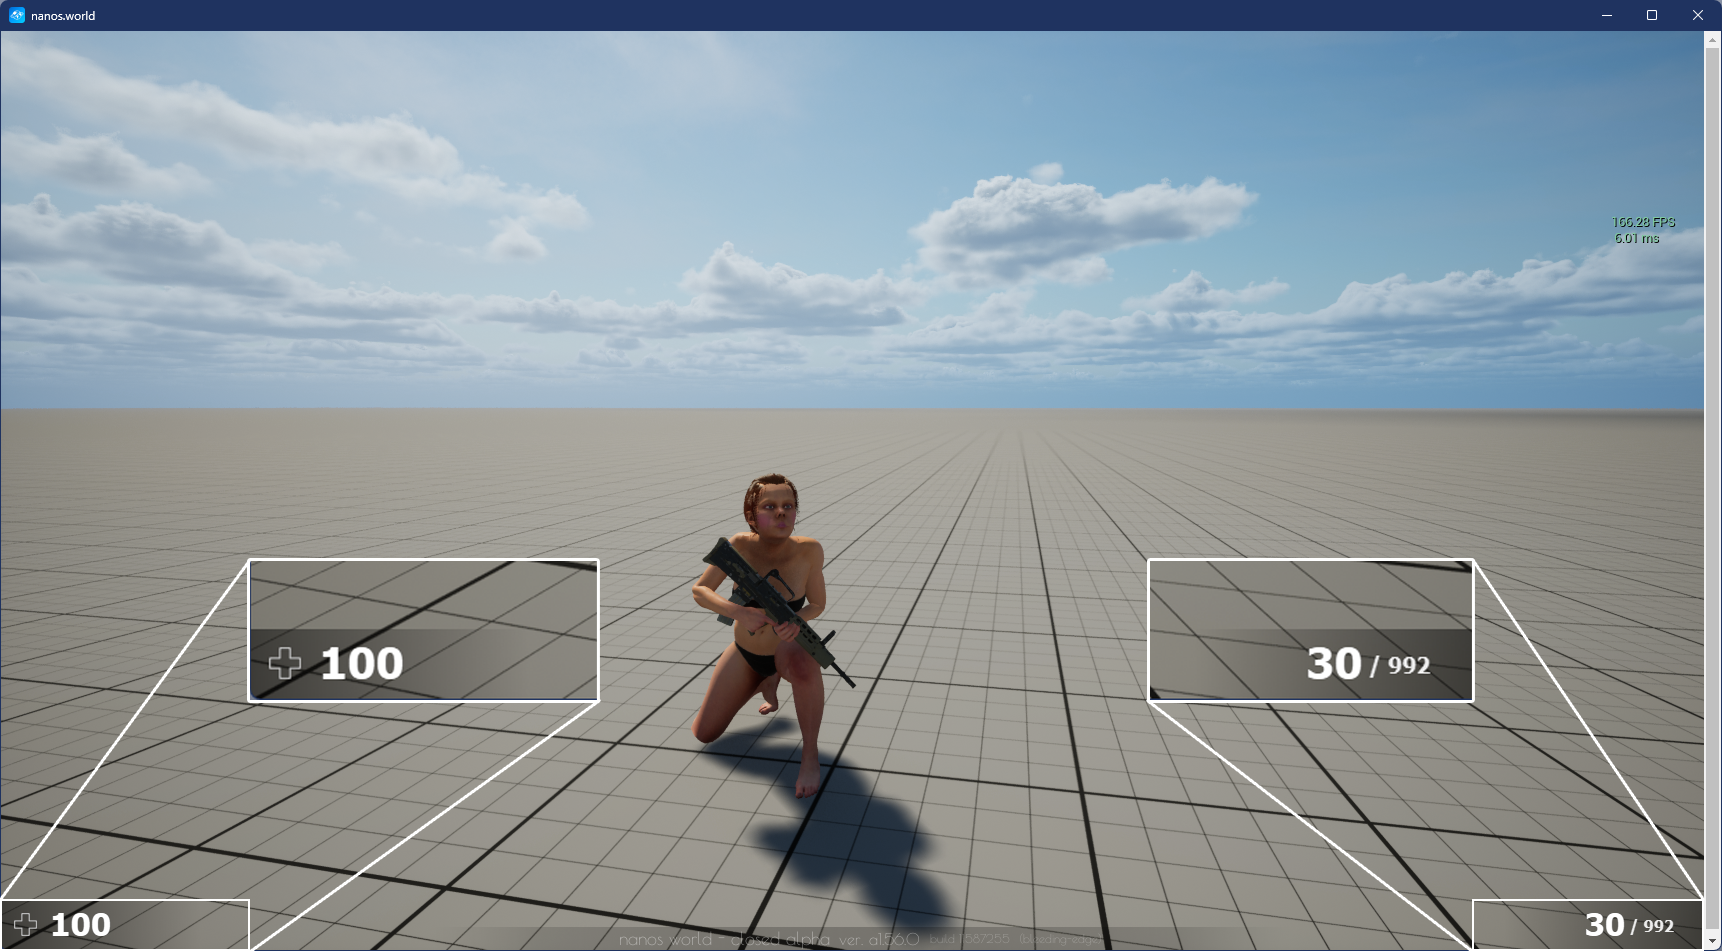
大功告成!你的应用现在应该已经准备好在 nanos world 中使用了。要进行测试,只需运行你的服务器并欣赏你的劳动成果
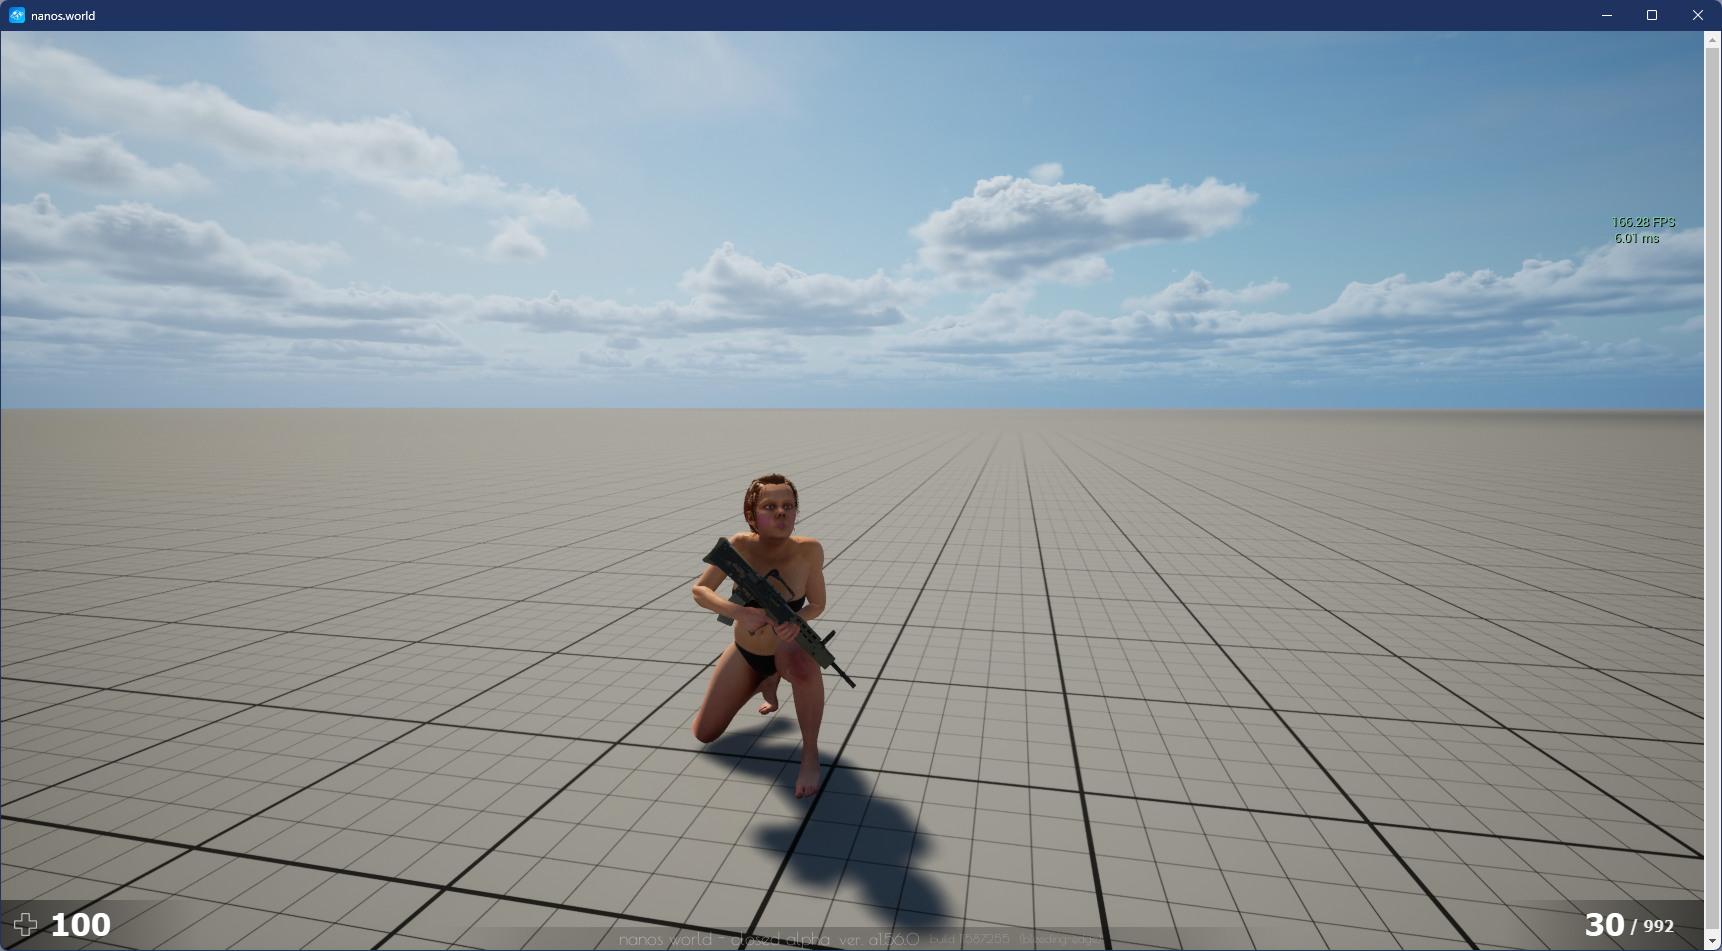
就这些!你的 React Web UI 现已成功集成到 nanos world 中,随时可以使用。欢迎在你自己的项目中使用此示例 :)