工具枪
How to create new Tool Guns for the Sandbox game-mode
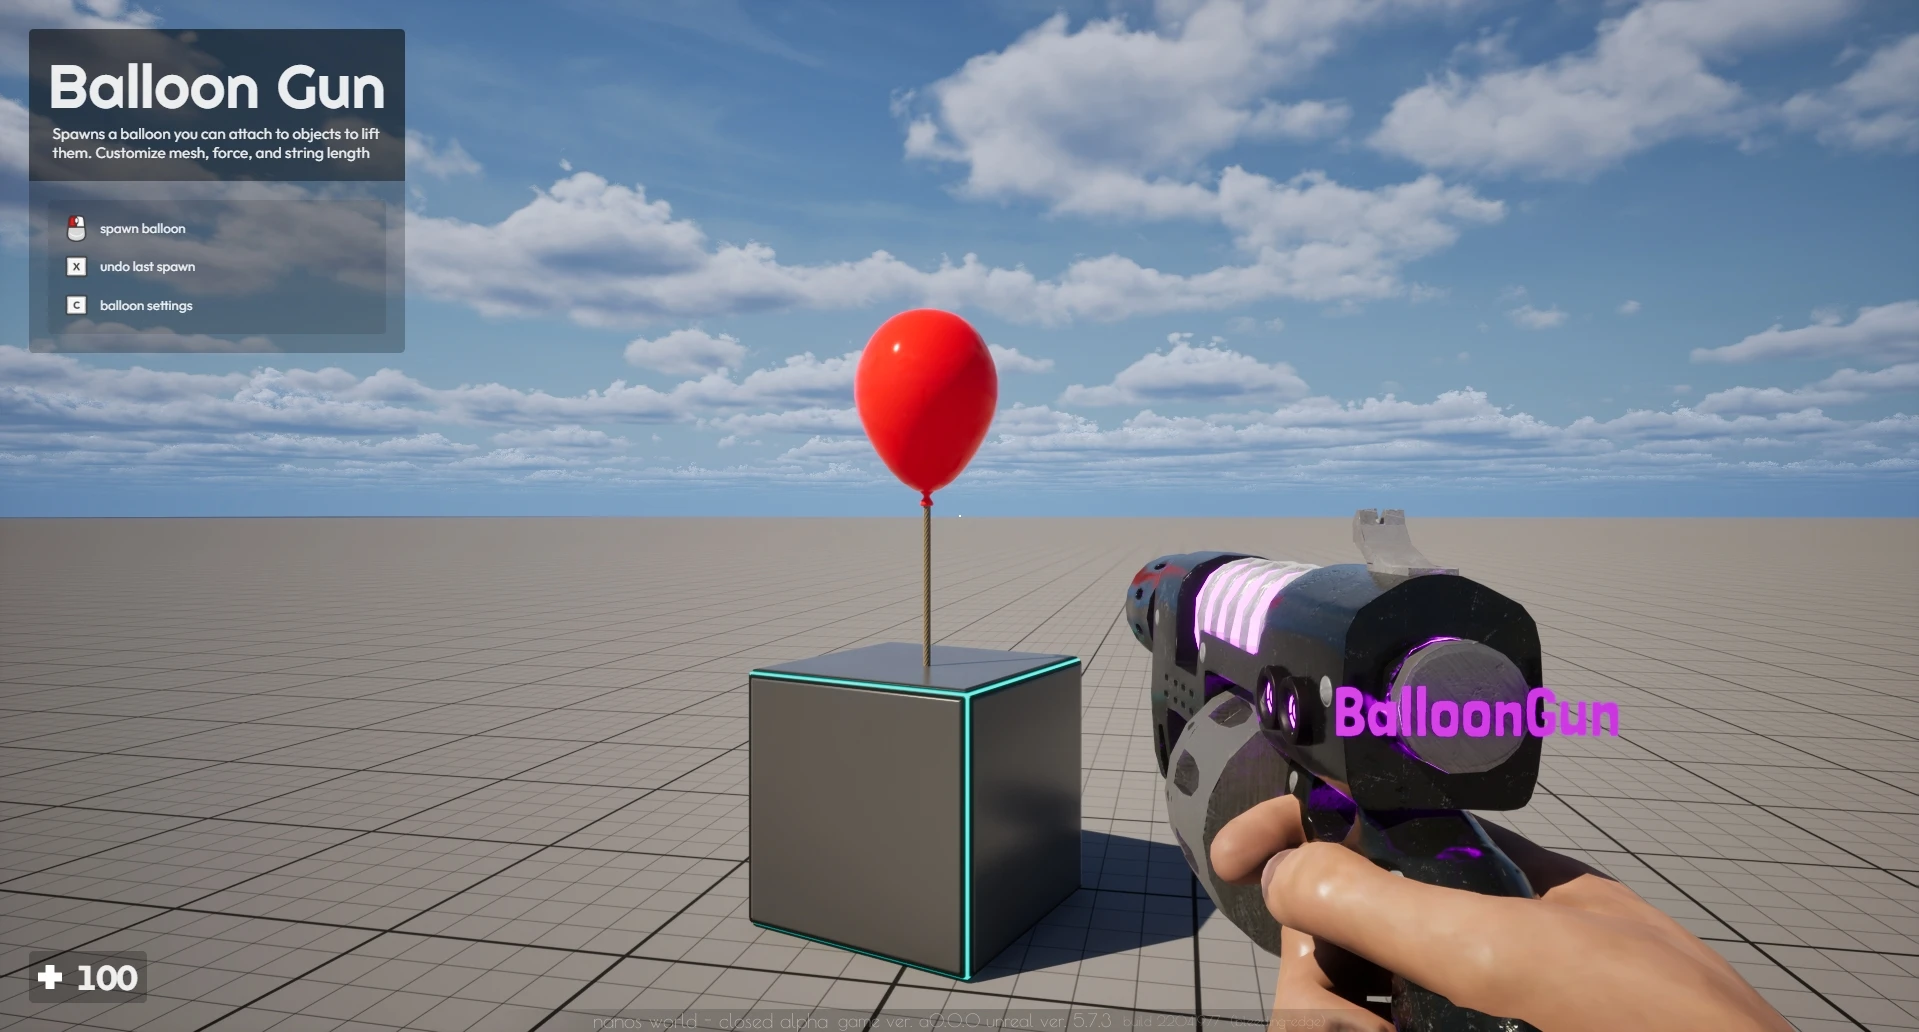
这种工具枪方案是沙盒游戏模式的一种约定,并非全局游戏概念。
沙盒游戏模式定义了一个 ToolGun 类(在 GitHub 上查看:服务器与客户端),有助于基于基础工具枪创建新工具。
创建自定义工具枪
To create your own Tool based on Sandbox's ToolGun, you need to create a new Class inheriting from it passing some custom parameters to the Class. The Sandbox defines ToolGun separately on each side, so you must inherit it on both Client/ and Server/ (the custom values below are only needed on the Client side):
MyToolGun = ToolGun.Inherit("MyToolGun", {
	-- Spawn Menu
	name = "My Tool Gun",
	image = "package://my-package/Client/MyToolGun.webp",
	category = "tool-guns",

	-- Tool Gun Description which will be displayed on Top Left
	description = "Do magic things!",

	-- Tool Gun Tutorials which will display on Top Left
	tutorials = {
		{ key = "LeftClick", text = "spawn my entity" },
		{ key = "Undo", text = "undo spawn" },
		{ key = "ContextMenu", text = "spawn settings" },
	},

	-- Tool Gun Tips that will appear as notifications at each 1 minute
	tips = {
		"you can use this tool gun to do awesome stuff!",
		"be aware to do not have overdose of fun!"
	},

	-- Tool Gun Trace Debug Settings, which will display on World when aiming with this Tool Gun
	debug_trace = {
		-- Defines which Collision Channel to trace when firing with this Tool Gun
		collision_channel = CollisionChannel.WorldStatic | CollisionChannel.WorldDynamic | CollisionChannel.PhysicsBody | CollisionChannel.Vehicle,

		-- If the tool gun should display a crosshair on the trace result when aiming
		show_crosshair = false,

		-- If the tool gun should display a preview mesh on the trace result when aiming
		show_preview_mesh = true,

		-- Preview mesh configuration
		preview_mesh = "nanos-world::SM_Toaster",
		preview_mesh_scale = Vector(1, 1, 1),
		preview_mesh_offset = Vector(0, 0, 0),
		preview_mesh_rotation = Rotator(0, 0, 0),
		preview_mesh_rotation_fixed = false
	}
})
name、image 和 category 的值供生成菜单使用,以便在菜单中正确显示。 The category must be one of the categories of the tools tab: tool-guns, spawners or constrainers.
The other values description, tutorials, tips and debug_trace are used by the ToolGun to add custom tutorials or behaviors when using it. 这些参数是可选的。
Those values are only used on Client Side, so on the server you can just call MyToolGun = ToolGun.Inherit("MyToolGun").
你还可以通过在工具枪类上定义 picked_context_menu_items 表,为你的工具枪在上下文菜单中添加自定义条目。当你捡起工具枪并打开上下文菜单时,这些配置就会出现:
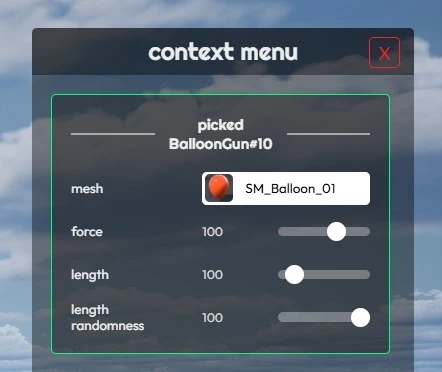
-- Defines the initial value for your custom Tool Gun value
MyToolGun.my_custom_value = 123

-- My Tool Gun Context Menu Callback
function MyToolGun.SetMyCustomValue(value)
	MyToolGun.my_custom_value = value

	-- You can do something with this value here,
	-- 	like calling remote event to inform the server side
end

-- Tool Gun Context Menu Entries which will display on Context Menu
MyToolGun.picked_context_menu_items = {
	{
		id = "my_tool_gun_custom_value",
		type = "range",
		label = "custom value",
		min = 0,
		max = 1000,
		callback = MyToolGun.SetMyCustomValue,
		-- Use a function, so the Context Menu always reads the current value
		value = function()
			return MyToolGun.my_custom_value
		end
	},
}
你可以参阅上下文菜单文档页面了解如何配置上下文菜单项。
重写工具枪客户端方法
ToolGun 在客户端有一些方法,你可以重写这些方法,以便在本地玩家与其交互时为工具实现自定义行为。
你只需在自定义工具枪类中重写它们即可实现:
-- 当你使用它开火时调用
function MyToolGun:OnLocalPlayerFire(character)
	-- 执行某些操作

	-- 这里很有用的做法是检测玩家射击的位置,
	-- 并将该坐标发送到服务端,以便在该位置生成物体
end

-- 当你捡起它时调用
function MyToolGun:OnLocalPlayerPickUp(character)
	-- 执行某些操作

	-- 比如启动某种效果或计算
end

-- 当你丢弃它时调用
function MyToolGun:OnLocalPlayerDrop(character)
	-- 执行某些操作

	-- 丢弃工具时,你很可能需要禁用任何效果或类似的东西
end
工具枪单目标与双目标
我们实现了 ToolGun 的两个子类,分别称为 ToolGunSingleTarget 和 ToolGunDoubleTarget,它们提供了一些额外功能,使创建在开火时需要一个或两个目标的工具枪变得更加简单。
ToolGunSingleTarget
当你想要创建一个在开火时只需要一个目标的工具枪时(例如在射击时于检测位置生成实体的工具枪),此类非常有用。
它使实现变得非常容易,因为你只需重写 OnLocalPlayerTarget 方法,在使用工具枪开火时该方法将携带检测结果被调用,因此你只需将该坐标发送到服务器以在该位置生成物体即可。
MyToolGun = ToolGunSingleTarget.Inherit("MyToolGun")

-- 重写 ToolGunSingleTarget 方法
function MyToolGun:OnLocalPlayerTarget(location, relative_location, relative_rotation, normal, entity)
	-- 调用远程事件以在该位置生成物品
	self:CallRemoteEvent("SpawnSomething", Reliability.Reliable, location, relative_location, relative_rotation, normal, entity)
end
And on the server side, receive it and do the action (always validating what the client sent):
MyToolGun = ToolGunSingleTarget.Inherit("MyToolGun")

-- Server-side remote events receive the Player as the first parameter after self
function MyToolGun:OnSpawnSomething(player, location, relative_location, relative_rotation, normal, entity)
	-- Don't trust the client: check the player is holding this tool and is close to the location
	local character = player:GetControlledCharacter()
	if (not character or character:GetPicked() ~= self) then return end
	if (character:GetLocation():Distance(location) > 5000) then return end

	local prop = Prop(location, Rotator(), "nanos-world::SM_Toaster")

	-- Allows the player to undo it
	Sandbox.SpawnHistory.AddItemToHistory(player, prop)
end

MyToolGun.SubscribeRemote("SpawnSomething", MyToolGun.OnSpawnSomething)
ToolGunDoubleTarget
当你想要创建一个开火时需要两个目标的工具枪时(例如将两个实体焊接在一起的工具枪),此类非常有用。
你可以重写 OnLocalPlayerTarget 方法,该方法仅在两个目标都已设置时才会被调用,因此你只需将这两个坐标发送到服务端对其执行相应操作即可。
MyToolGun = ToolGunDoubleTarget.Inherit("MyToolGun")

-- Overrides ToolGunDoubleTarget method
function MyToolGun:OnLocalPlayerTarget(targeting_first_to, targeting_first_relative_location, targeting_first_relative_rotation, targeting_second_to, targeting_second_relative_location, targeting_second_relative_rotation)
	-- Calls remote to weld the two entities together
	self:CallRemoteEvent("Weld", Reliability.Reliable, targeting_first_to, targeting_second_to, targeting_second_relative_location)
end
The server side works the same way as the ToolGunSingleTarget example above: inherit ToolGunDoubleTarget on the server and subscribe to the "Weld" remote event with MyToolGun.SubscribeRemote.
示例
你可以在沙盒的 Tools/ 文件夹中找到更多工具示例(包含客户端和服务端)。
Now it's up to you to create your own Packages with your own Tools!