Store
The nanos world Store is where you share your Game Modes, Packages and Asset Packs with the nanos world community!
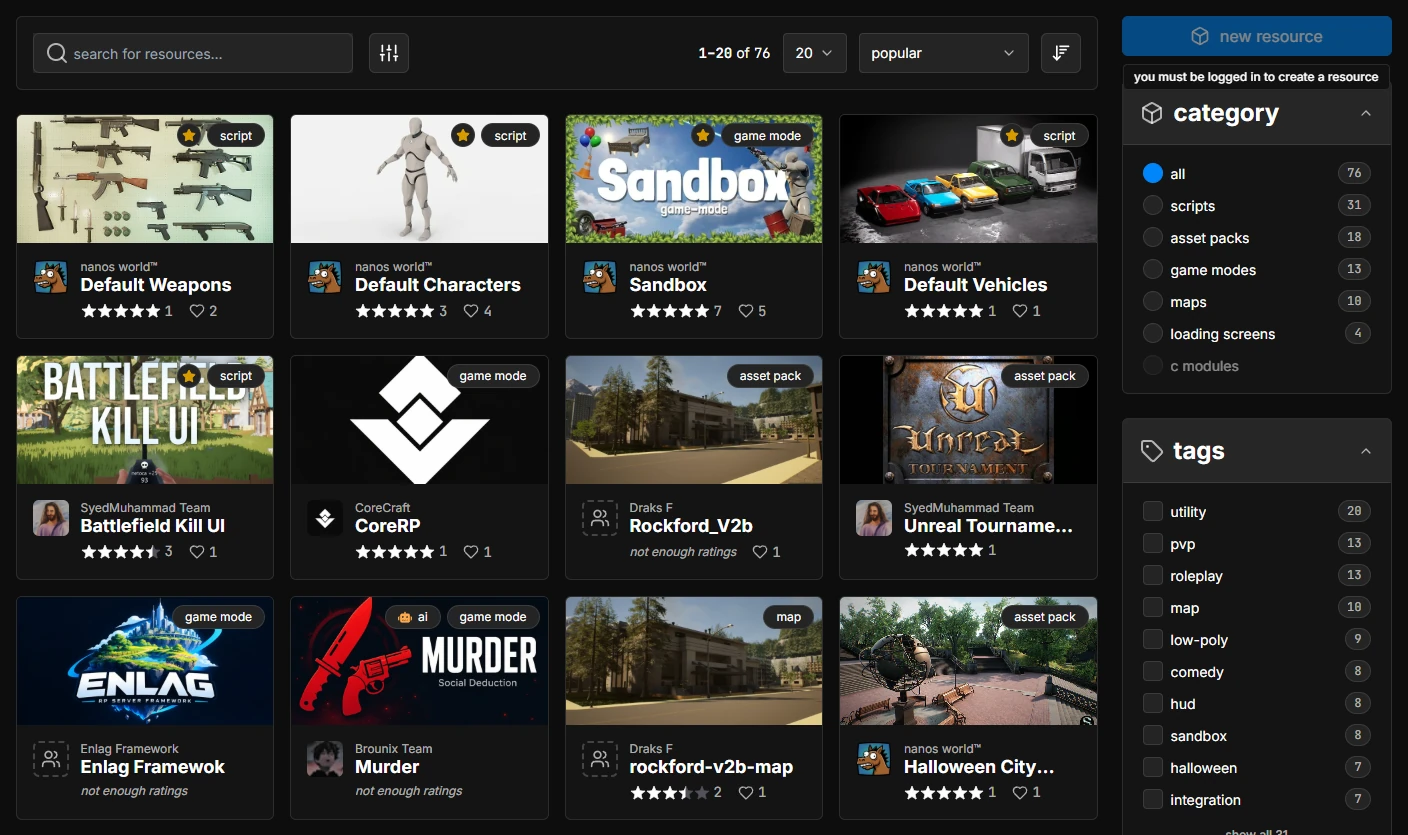
About the Store
Everything published in the Store is called a Resource: a Package (scripts, game modes, maps, loading screens and C modules) or an Asset Pack. Resources can be browsed, downloaded, reviewed and favorited by anyone, and they are 100% integrated with the in-game Vault and the server CLI.
You can filter the Store by category, tags, languages and rating, sort it by popularity, downloads and more, or search for anything from the search bar at the top of the website.
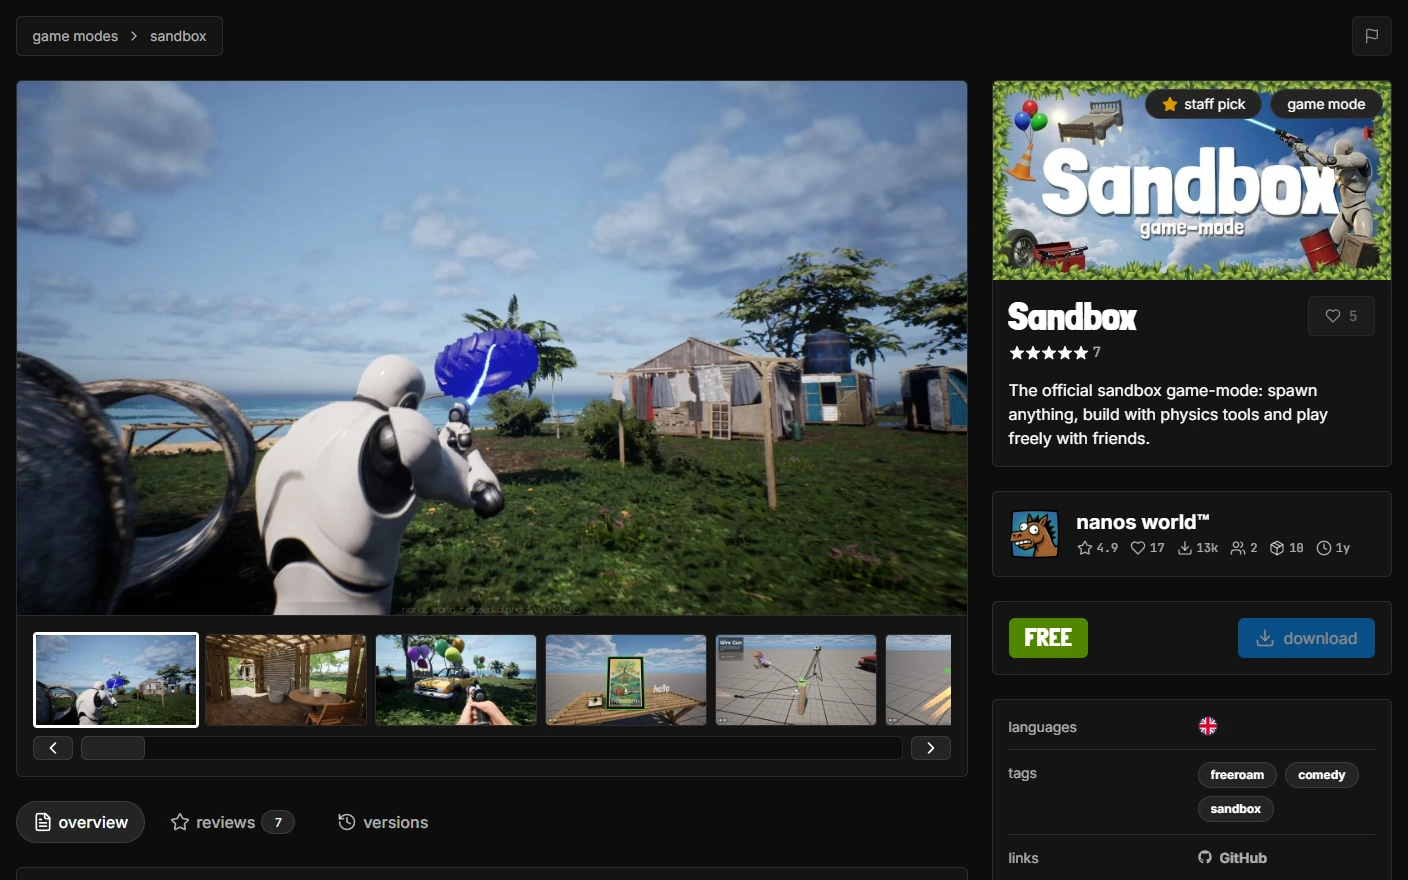
Resource Page
Each Resource has its own page with its screenshots and videos, description, reviews and the full list of versions with their changelogs. From there you can download the latest version, favorite it, see the Team behind it and report it.
Publishing Resources
Resources always belong to a Team, so create one (or join one) before publishing. Every member with the developer role or above can manage the Team's Resources.
Creating a Resource
To create a new Resource from the website, go to Account → Packages (or Account → Asset Packs) and press the new package (or new asset pack) button. A short wizard will ask for the Team, name and type of your Resource.
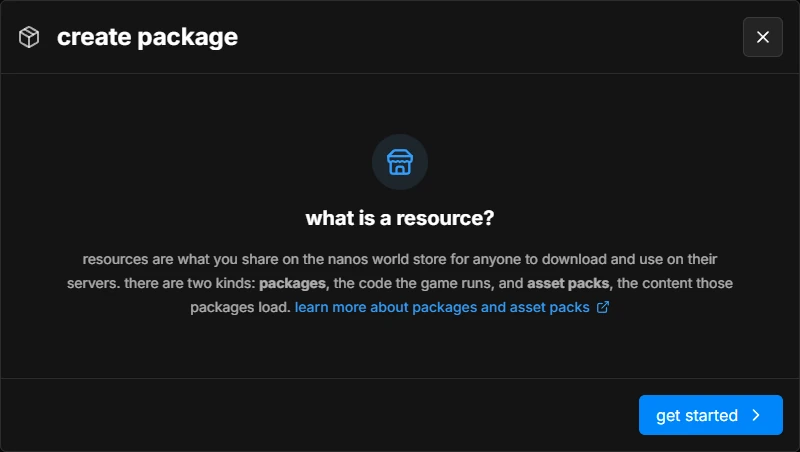
The Resource name is its unique identifier (used in Config.toml, requirements and the Vault), so it must match your Package or Asset Pack folder name: lowercase, containing only letters, numbers and -.
You can also create Resources from within the game, see Creating a Store Resource in the Vault.
Managing a Resource
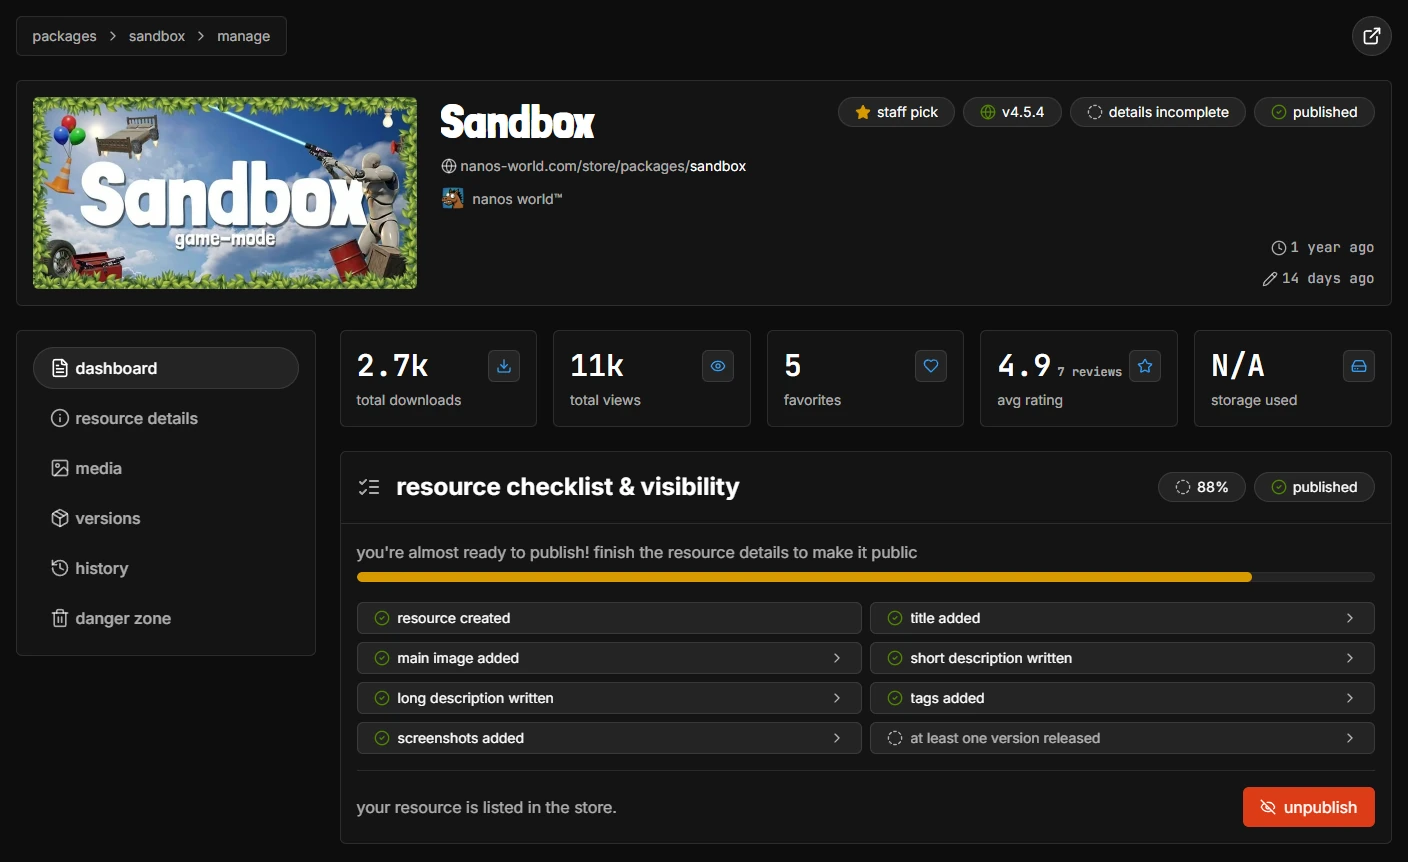
Every Resource you can manage has a manage button on its page, which opens its management page (https://nanos-world.com/store/packages/<name>/manage or https://nanos-world.com/store/assets/<name>/manage):
- dashboard: stats (downloads, views, favorites, ratings and storage used) and a checklist of everything your Resource needs before it can be listed, plus the button to publish or unpublish it
- resource details: title, summary, description, tags, languages and links
- media: main image, screenshots and videos
- versions: upload, release and manage versions (see below)
- history: every change made to the Resource, and by whom
- danger zone: transfer the Resource to another Team, or delete it
Uploading Versions
Every version of a Resource is a .zip of its folder (the one containing the Package.toml or Assets.toml). The version number is read from that .toml file, so bump it (following Semantic Versioning) before uploading a new one.
There are several ways to upload a new version:
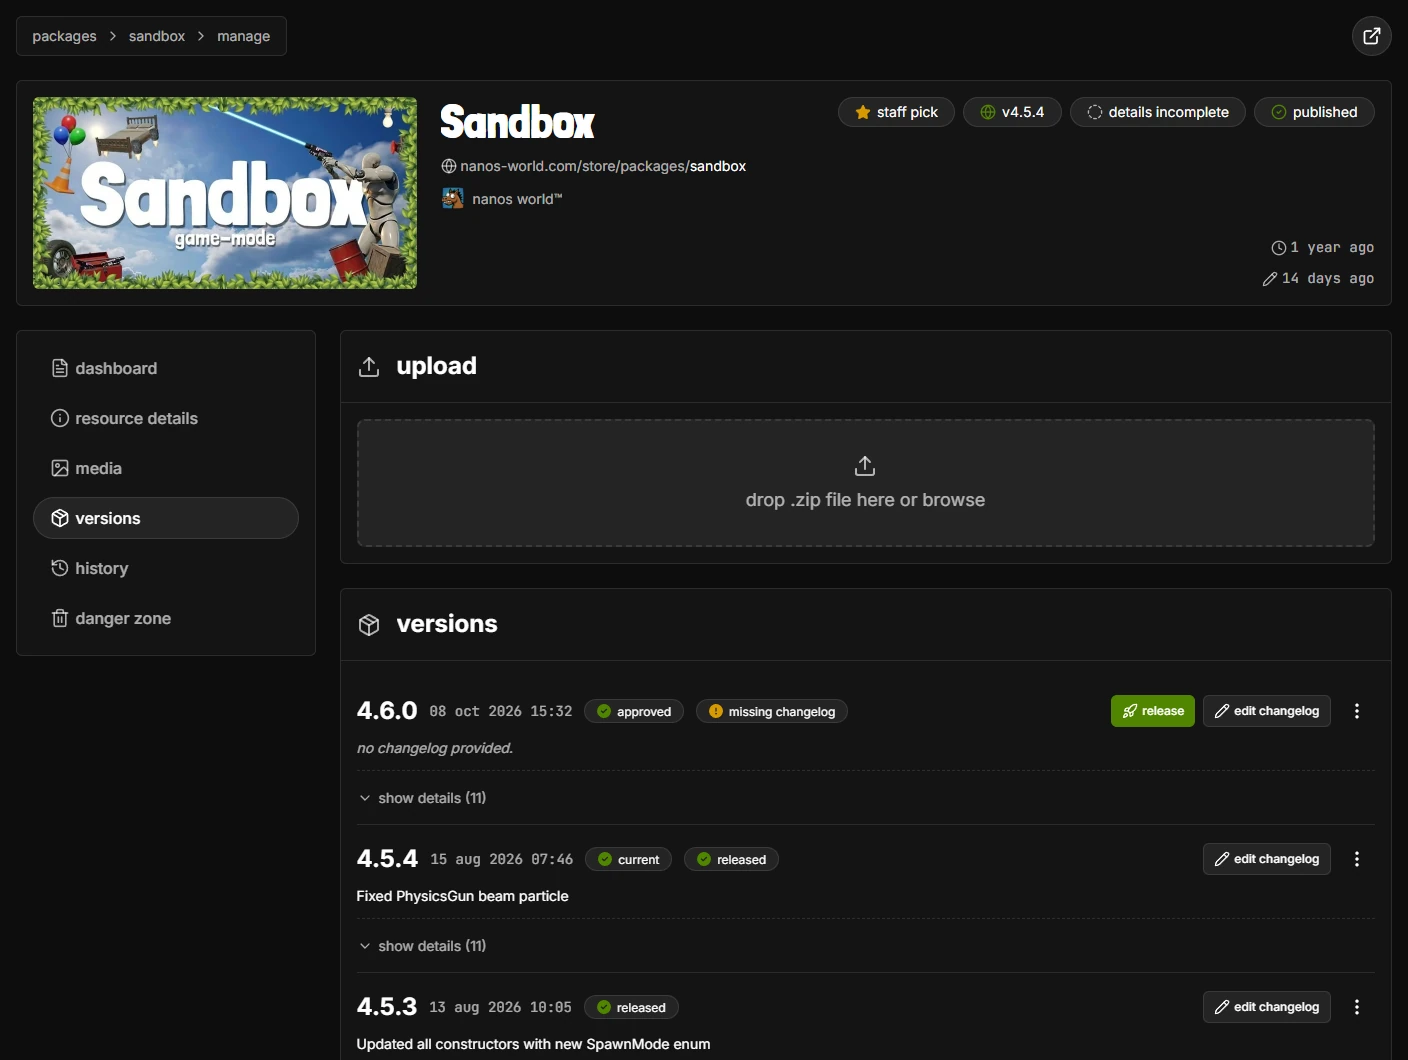
- Website: in the versions section of the management page, drop the
.zipfile in the upload area - Vault: from within the game, see Managing Resources Versions
- CLI: run
upload package <name>orupload assets <name>on your server, see the CLI - GitHub Actions: upload automatically on every new tag, see Automate GitHub Releases
Validation and Release
After uploading, every version goes through an automated validator, which checks the files and reads the version number, requirements and other settings from the .toml. While it runs the version shows as pending, and then as approved (or declined, with the reason).
Approved versions are not public yet: add a changelog with edit changelog and press release to make it available to everyone, in the Store, in the Vault and for servers downloading it.
Access Tokens
An Access Token (also called Personal Access Token, or PAT) authenticates your account outside the website. It is used by the server CLI, by --auto_download when fetching Resources you own, by the GitHub Action and by any script calling the API.
It has the same rights as your account to download and upload the Resources of your Teams, so keep it secret.
Generating a new Token
To generate a new token, go to Account → Access Tokens and press the create token button.
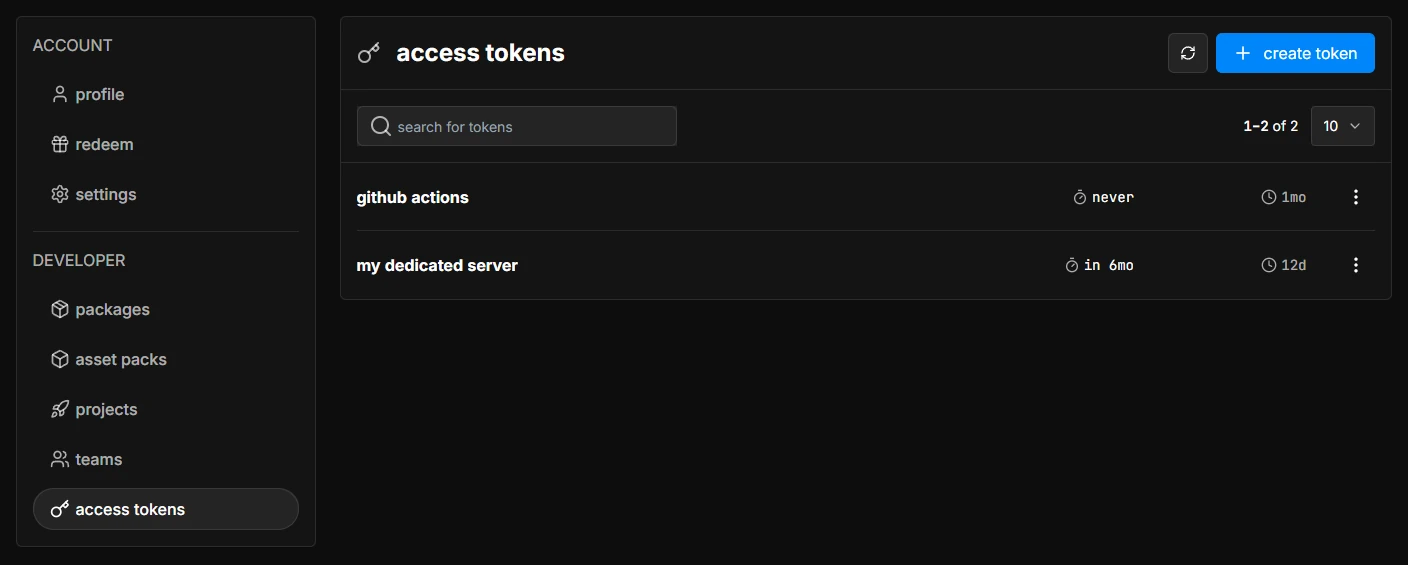
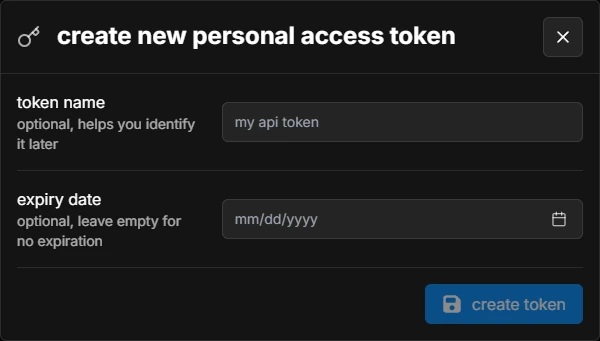
You can give your token a name (to identify it later) and an expiry date (leave it empty for a token that never expires).
After it is created, copy the token and save it somewhere safe: it is only shown once, and you won't be able to see it again. If you lose it (or it leaks), delete it from the list and create a new one.
Using the Token in the Server
Paste your token in the token field of your server's Config.toml, or pass it with --token in the command line, and you are authenticated to run CLI commands!
[general]
    token = "<your-token>"
Using the Token with the API
The same token authenticates requests to the nanos world API (https://api.nanos-world.com). Send it in the Authorization header, prefixed with Token :
curl -H "Authorization: Token <your-token>" https://api.nanos-world.com/user/me
The full list of endpoints is in the API reference.
Automate GitHub Releases
This workflow is maintained by the community. For more details, visit the open source GitHub Repository.
If your Package is on GitHub, you can use the community created nanos world Store Publisher Action to upload new versions automatically! It handles version checking, zipping and uploading to the Store.
The action only supports Packages for now. Asset Packs must be uploaded through the website, the Vault or the CLI.
Setting up the GitHub Action
1. Add Your Token as a Secret
- Create a token as described in the Generating a new Token section
- Go to your repository Settings → Secrets and variables → Actions
- Click New repository secret
- Name:
NANOS_STORE_TOKEN - Secret: your token generated in step 1
- Click Add secret
Never paste the token directly in the workflow file: anyone with access to the repository would be able to use it.
2. Create Workflow File
Create a .yml file inside your repository as .github/workflows/publish.yml with the content:
name: Publish to nanos world Store

on:
  # runs when you push a version tag (e.g. v1.0.1)
  push:
    tags:
      - 'v*'
  # allows running it manually from the Actions tab
  workflow_dispatch:

jobs:
  build:
    runs-on: ubuntu-latest
    name: Publish package
    steps:
      - uses: actions/checkout@v4

      - uses: nanos-world/store-action@v1
        with:
          NANOS_PERSONAL_ACCESS_TOKEN: ${{ secrets.NANOS_STORE_TOKEN }}
          NANOS_PACKAGE_NAME: 'your-package-name'  # Replace with your package name
If your Package is not at the root of the repository, set PACKAGE_PATH to its folder.
Publishing a New Version
Update the version in Package.toml
[meta]
    version = "1.0.1"  # Increment from previous
Commit, tag and push
git add Package.toml
git commit -m "Bump version to 1.0.1"
git tag v1.0.1
git push origin main --tags
The action will upload the new version when you push the tag! Once the validator approves it, add a changelog and press release (on the website or in the Vault) to make it available to everyone, see Validation and Release.
You can also trigger the workflow manually from the Actions tab in your repository, thanks to the workflow_dispatch event.
The action reads the version from your Package.toml and compares it with the latest one in the Store. Your local version must be greater than the Store version for the upload to succeed.
Multiple Packages in the Repo
If you have multiple Packages in your repository, add one step per Package, pointing PACKAGE_PATH to its folder and NANOS_PACKAGE_NAME to its name:
      - uses: nanos-world/store-action@v1
        with:
          NANOS_PERSONAL_ACCESS_TOKEN: ${{ secrets.NANOS_STORE_TOKEN }}
          NANOS_PACKAGE_NAME: 'my-first-package'
          PACKAGE_PATH: 'path/to/my-first-package'

      - uses: nanos-world/store-action@v1
        with:
          NANOS_PERSONAL_ACCESS_TOKEN: ${{ secrets.NANOS_STORE_TOKEN }}
          NANOS_PACKAGE_NAME: 'my-second-package'
          PACKAGE_PATH: 'path/to/my-second-package'
For more configuration options and troubleshooting, visit the action repository.